The Project settings let you control various global styling aspects of your Blocs project.
Accessing the Project Settings
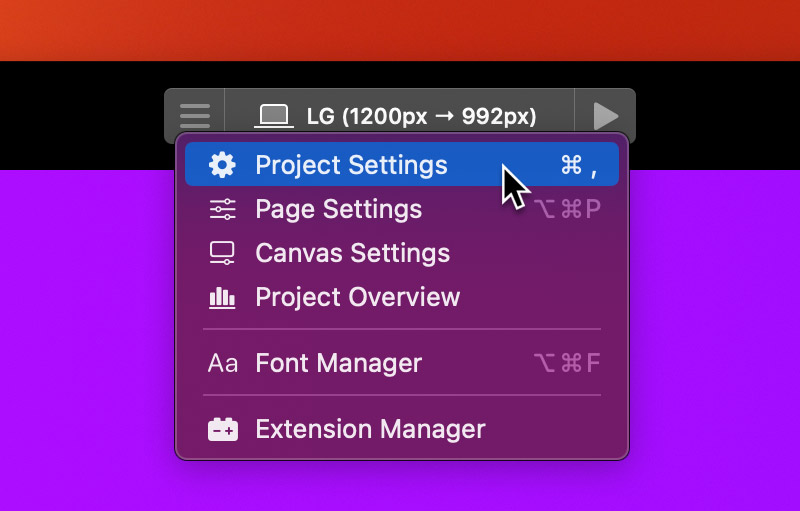
You can access the main Project settings by navigating to File > Project settings from the apps main menu.
General Settings
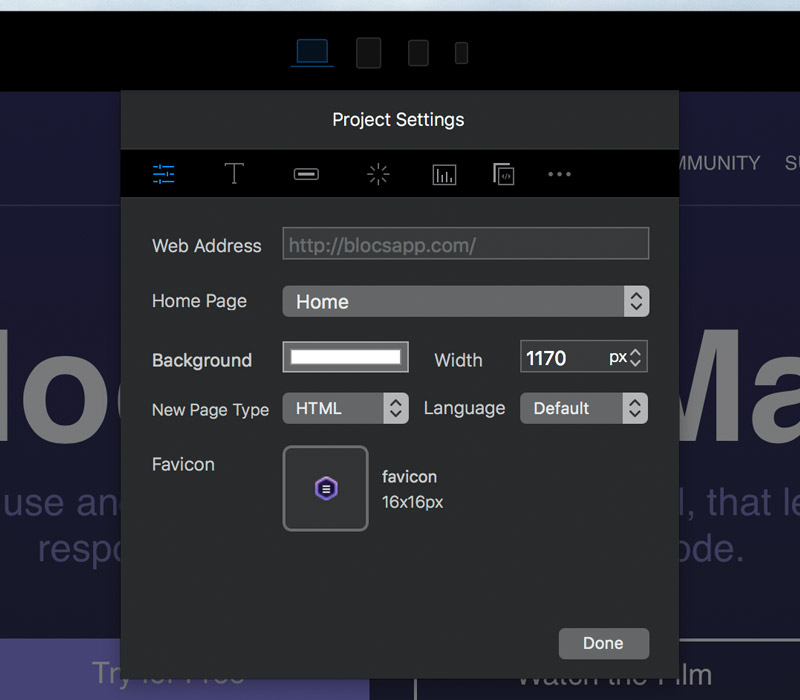
Web Address
The web address is the URL that you plan to host your site at. Populating this field is important if you want a site map generated when you export your site.
Home Page
By default Blocs uses the first page in your project as the sites homepage. Using this drop down menu enables you to set the homepage to any of the pages in your project.
Background Color
By default sites created within Blocs have a standard white background, this colour well enables you to set a custom global background color for your entire site.
Width
The width option lets you set the maximum width that your site will stretch to fit. By default it’s set to 1170px, this means once the width of the browser it’s being viewed in is 1170px wide your website will no longer grow in width to fill the available space. Instead, it will remain at 1170px wide, but horizontally centre in the middle of the available space, within the browser window.
This value can be set to anything, for example: if you want your site to fill the browser edge to edge no mater what size the browser window is, you would change this value to 100%;
New Page Type
By default Blocs creates all new pages with the .html suffix. This option lets you set the default new page file type, to one of the supported page file formats.
Language
By default Blocs doesn’t set a sites language attribute. The language drop down menu lets you set the default language attribute for all new pages. Please note, this option does not update the language attribute for currently created pages.
Adding a Favicon
To add a favicon to your site, click on the small favicon thumbnail and then select the artwork you would like to use as your site’s favicon. For best results use a .png sized at 16x16px.
Active Link Class
The active class is the custom class that will be applied to all navigation links that match the current browser URL. This class is applied to the current active page link in the main site navigation. You can read more about the active state class and how to use it here.
Global Typography Settings
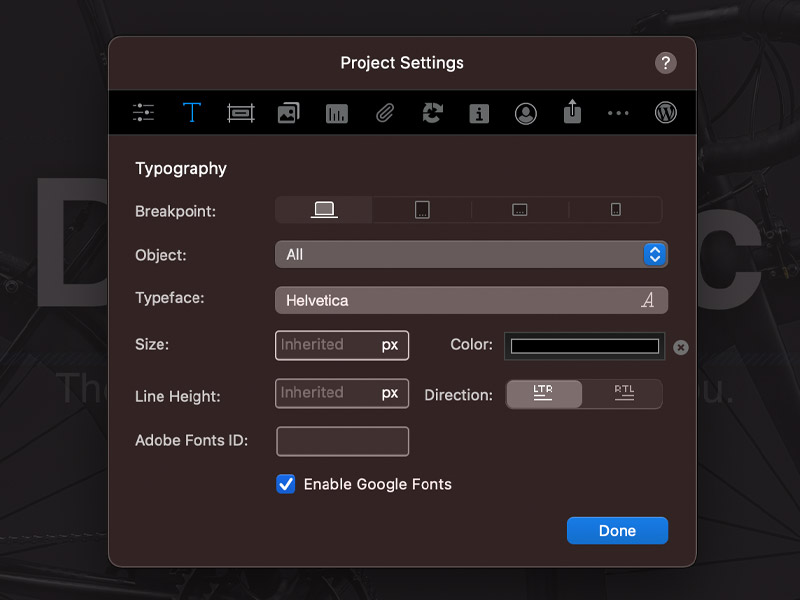
Using the global text options, it’s possible to control how text looks for all text objects throughout your entire project. The text in web pages is usually wrapped within HTML tags such as headers and paragraphs. These global options let you set the basic style values such as typeface, font size and colour for these tags. More advanced users can also make more detailed style adjustments using the Class Manager and Class Editor that is available with Blocs.
Global Button Settings
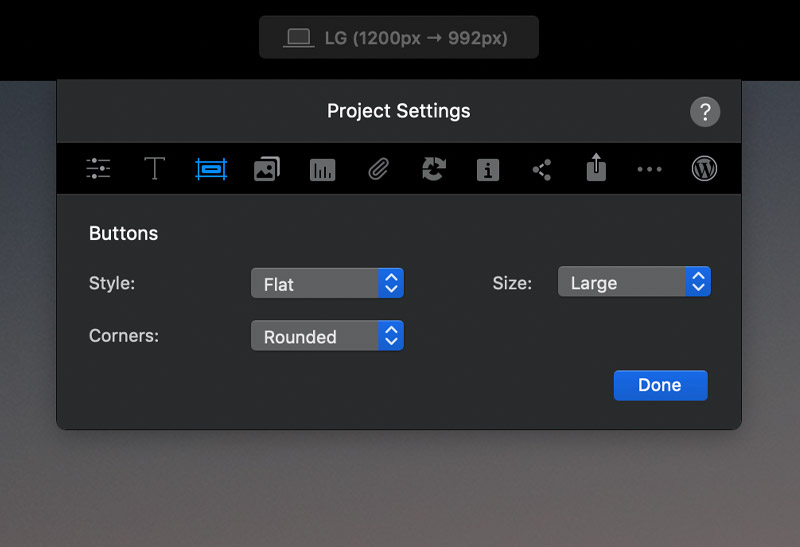
The global button settings let you set the overall appearance of newly generated buttons within Blocs, whether they are dropped in as Brics or added as part of a pre-made Bloc. You can control the style, size and corner type of any button generated within your project.
Remember, the appearance of a button can also be customised per button, using the sidebar button options.
Pre-Loader Settings
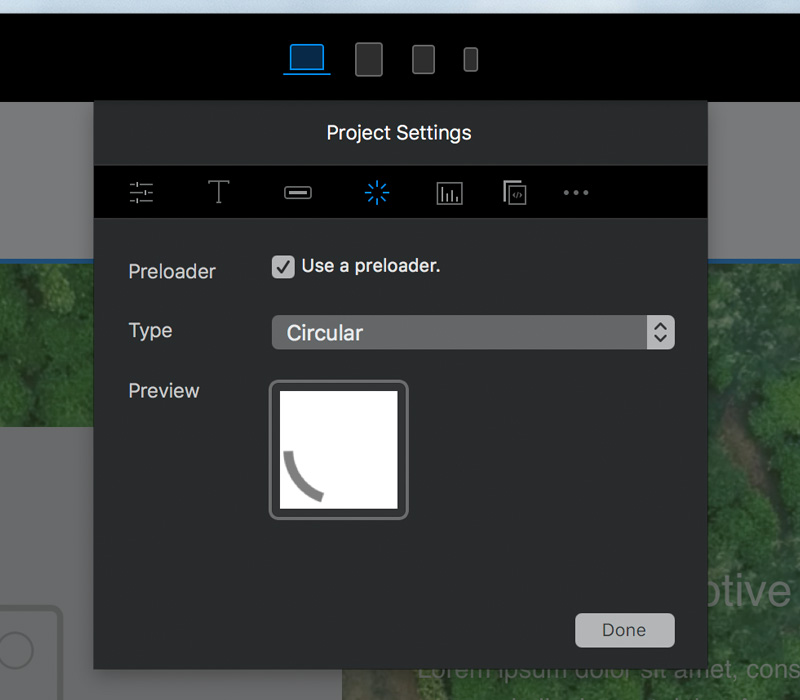
To improve the presentation of your website, Blocs automatically integrates a small preloading animation. This animation is displayed in the visitor’s browser until the site is fully loaded. Once your site is fully loaded, the pre-loader will automatically disappear and the webpage will be shown.
Analytics
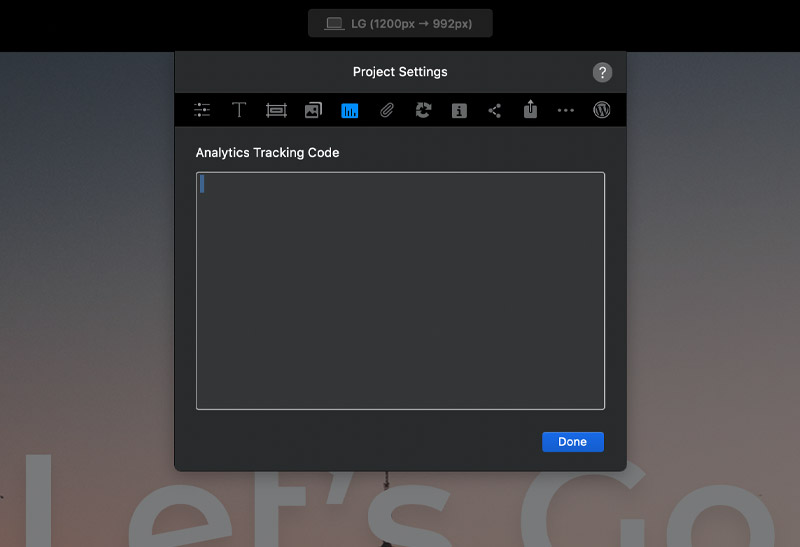
Analytic web services let you track user statistics for your site. These 3rd party services generally provide a small code snippet that must be added to any of the website pages you wish to track activity on. Placing the code snippet in this text area will add it to all pages within your project.
Project Attachments
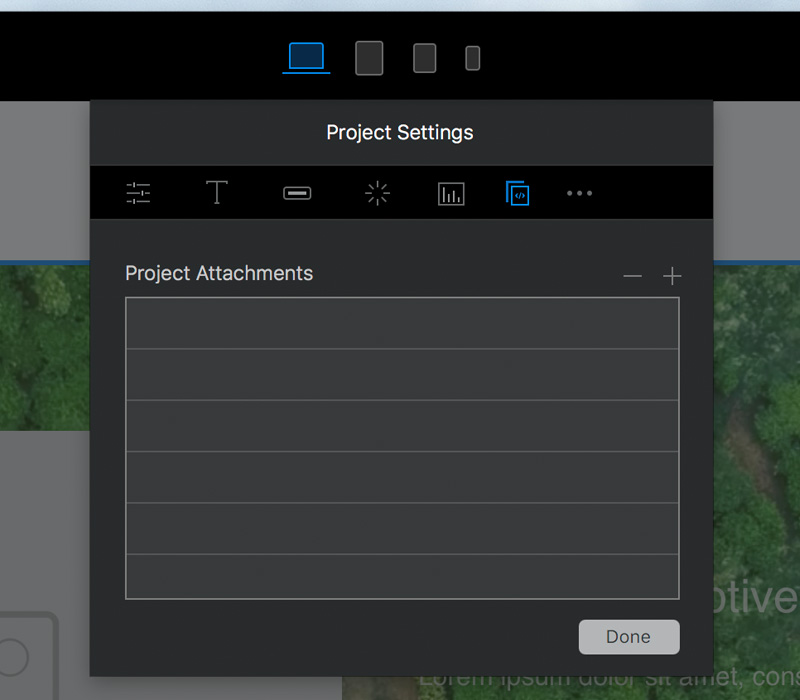
Project attachments are a little like page attachments with the major difference being these attachments are added to the header sections of every page in a project. As well as adding JS and CSS files, you can also add HTML files, PHP files or even entire directories full of files that you would like included in the final export of your project.
Export Settings
The export settings are the same as the settings found on the advanced export sheet. These settings give you access to various options that can be used to help improve the performance of your site once it’s hosted.
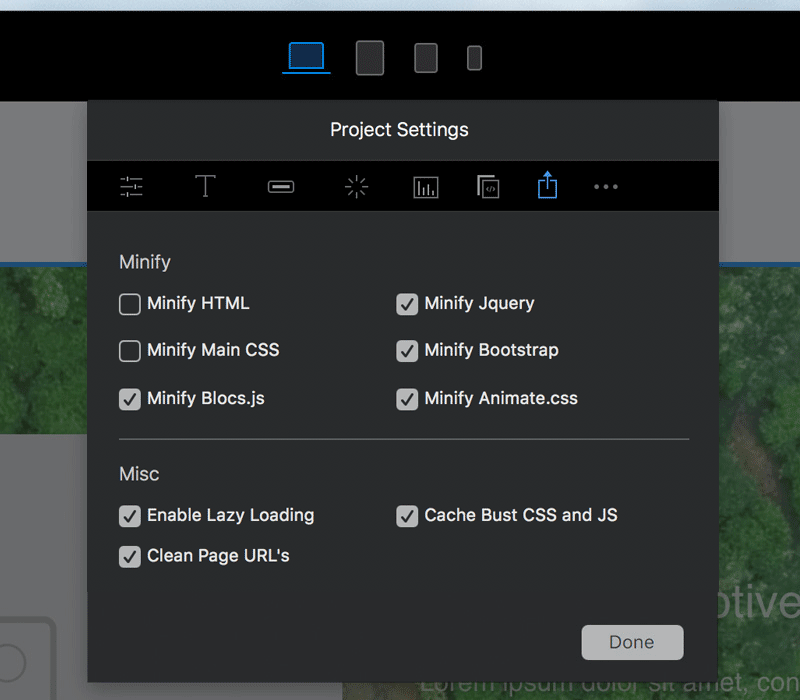
Minify
Minification (also minimisation or minify), is the process of removing all unnecessary characters from source code without changing its functionality. The major benefit of using minification, is it can greatly improve the loading time of a website.
Lazy Loading
Normally when a user opens a webpage, the entire page’s contents are downloaded and rendered in a single go. While this allows the browser to cache the web page, there’s no guarantee that the user will actually view all of the downloaded content.
Instead of bulk loading all of the content when the page is accessed, content can be loaded when the user accesses a part of the page that requires it. With lazy loading, pages are created with placeholder content which is only replaced with actual content when the user needs it.
When enabled Lazy load can help to improve the loading speed of a media rich web page.
Clean Page URL’s
By default, the internal URL structure of sites created within Blocs includes the full file name, for example:
blocsapp.com/press.html
Enabling clean URL’s will remove the file extension from internal page URL’s within your site, giving them a cleaner appearance, for example:
blocsapp.com/press/
Although it is not essential, using clean URL’s can help to improve SEO.
Cache Bust CSS and JS
By default web browsers are designed to cache important parts of web pages. The reason for this is to help speed up load times. Cached resources are stored on the visitor’s computer, which means the next time they visit a site, these resources load faster, as they are stored locally. However, there are times when this can be problematic, for example. If you make big visual styling changes to your site and re-upload to your server, anyone visiting your site with a cached version of the style sheet, will still see the old visual styling, which may cause your site to appear broken. When enabled, cache busting adds unique suffixes to the file paths of the CSS and JS files used within your site. Once your new site is hosted, these suffixes force the visitor’s browser to re-load the code from the server and create a new cached version of the resource.
Misc

The miscellaneous settings give you access to a range of other features you may wish to integrate into your site.
CMS Settings
Blocs has integrated support for a range of premium and open source third party content management systems, allowing you to easily create powerful, dynamic websites, that can be updated and contributed to outside of the Blocs application. This drop down control lets you set a target CMS for the project. You can read more about the CMS’s Blocs supports here.
Disqus Name
If you want to enable visitors to your site to leave comments on pages, we recommend using the 3rd party service Disqus. You can read more about setting up Disqus here.
Sitemap
This checkbox makes it possible to disable automatic sitemap generation.
Logo
The image file that is set here will be used as the site’s logo throughout the project. For example, if a new navigation Bloc is added that contains a logo, this image will be used for the logo within that Bloc, or, if the data feed of an image is set to logo, this image will be displayed.
Project Assets
Blocs allows you to embed all assets that are used in your site, into the main Blocs project file. The main benefit of doing this is it makes the process of working across multiple Macs a lot more streamlined, as everything used in the project is housed in a single file. The major downside to embedding assets in a project file is, future changes made to those assets will not be synced and reflected within Blocs.
On all new Blocs projects, asset embedding is enabled by default, however, it can also be disabled. When embedding is enabled, all newly added assets will be embedded into the project file, when embedding is disabled, Blocs will simply link to the original asset files.