If you are integrating 3rd party code or resources into your Blocs site there are times when you may need to add additional data attributes to certain elements within a page. The custom data attribute controls in Blocs make this a very simple and easy process.
What are custom data attributes?
Custom data attributes are intended to store custom data private to a page, for which there are no more appropriate attributes or elements, they are typically used with the page’s JavaScript to create a more engaging user experience. You can read more about custom data attributes here.
The Accordion and Tabbed content Bric both use custom data attributes in order to function correctly.
Adding an attribute
1. To add a custom data attribute to an element in Blocs, it first needs to be selected, do this by Left Clicking any element on the design canvas.
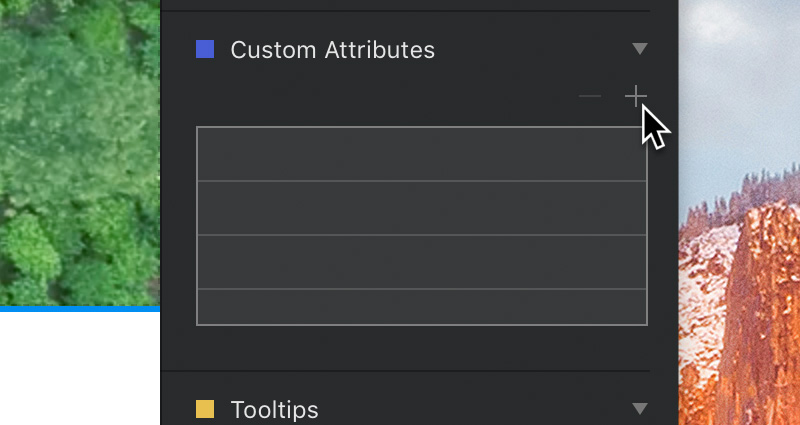
2. With an element selected now navigate to the Custom Attributes section located in the sidebar inspector options. These options consist of a small table with two buttons. An add button + and a remove button –.
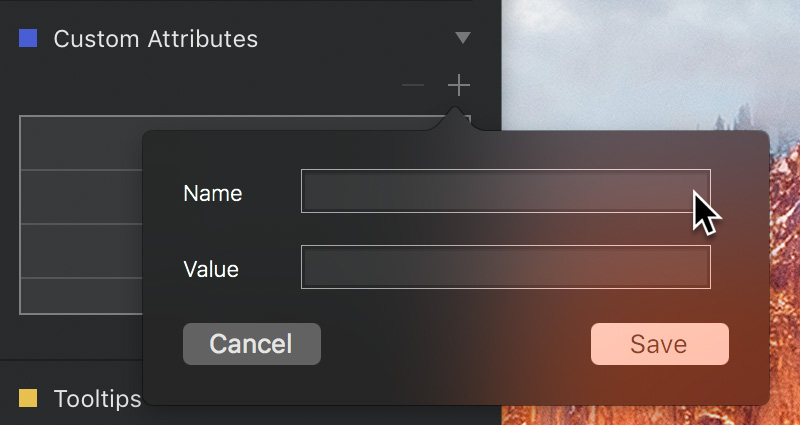
3. To add a custom attribute, simply click the add button + and input the attributes name and value into the popover that is displayed. Once you have added these details, Left Click the button labelled Save to store the data and apply the attribute to the selected item. You will also notice an attribute item for this custom attribute now appears in the attribute table.
Editing an attribute
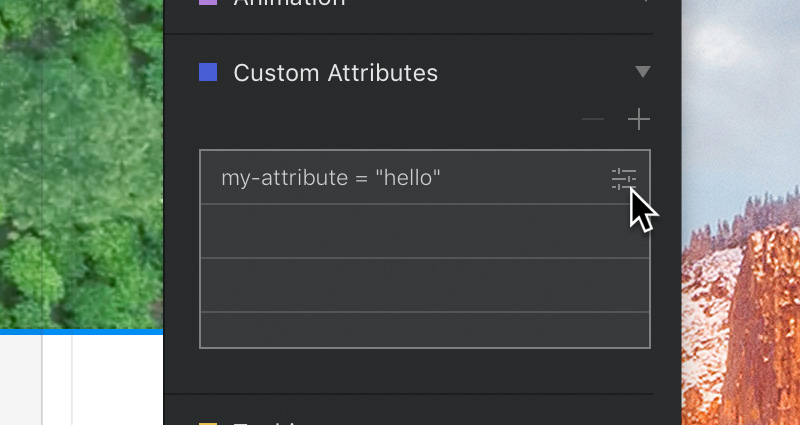
To edit an already existing custom attribute, simply Left Click the settings symbol, located to the far right of that attributes table item. This will reveal the input popover, enabling the values to be edited.
Removing an attribute
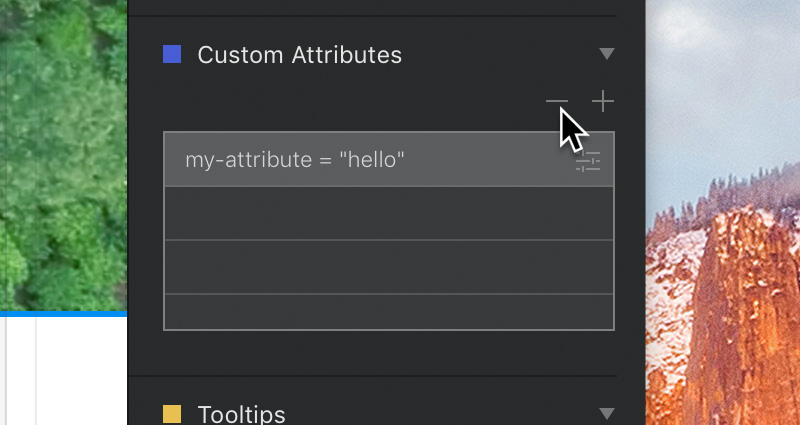
To remove a custom data attribute, simply select the attribute item in the table and then Left Click the remove button –.
Copy and paste
It’s also possible to copy and paste custom data attributes from one item to another. To copy a custom data attribute, select the attribute entry in the attribute table (located in the main inspector) and then use the keyboard shortcut ⌘C to copy the attribute item. Now select the object (via the layer tree or design canvas) you wish to paste the attribute too. After making this selection, take care to click inside of the custom data attribute table within the sidebar in order to activate it. With the custom data attribute table active, use the keyboard shortcut ⌘V to paste the copied attribute onto the currently selected item.